Huginn是一个神器,它是一个私人IFTTT,例如搭建任务采集触发平台,自动跟进实时提醒(用Email Slack Telegeram QQ 微信接受推送),全文 RSS 输出(把你关注的所有网页进行 RSS 全文输出),同时可以把各种app,软件,网络服务,网络设备等链接在一起做任务触发。
Huginn比起iFTTT,它更加强大,更加自动化,当然更加难以搞定。这是来自Huginn官网的一篇非常详细的关于Huginn手动安装教程,不要看这篇文章很长,但是老外写教程就是很认真,只要按照Huginn的官方教程成功在Debian/Ubuntu上安装Huginn的概率几乎就是100%。
网上也有一些Huginn安装的中文教程,但是Huginn的英文教程一直不断更新中,本篇文章就来记录一下Huginn手动在Debian/Ubuntu上安装的过程,参考的是Huginn最新的英文教程。由于英文原文非常长,所以只对关键地方作中文说明。


一、Huginn准备条件
操作系统要求:
Supported Unix distributions by this guide
- Ubuntu (16.04, 14.04 and 12.04)
- Debian (Jessie and Wheezy)
Ruby 版本
Huginn requires Ruby (MRI) 2.2 or 2.3. You will have to use the standard MRI implementation of Ruby. We love JRuby and Rubinius but Huginn needs several Gems that have native extensions.
Hardware requirements
CPU
- single core setups will work but depending on the amount of Huginn Agents and users it will run a bit slower since the application server and background jobs can not run simultaneously
- dual core setups are the recommended system/vps and will work well for a decent amount of Agents
- 3 cores can be needed when running multiple DelayedJob workers
内存
You need at least 0.5GB of physical and 0.5GB of addressable memory (swap) to install and use Huginn with the default configuration! With less memory you need to manually adjust the Gemfile and Huginn can respond with internal server errors when accessing the web interface.
- 256MB RAM 0.5GB of swap is the absolute minimum but we strongly advise against this amount of memory. See the Wiki page about running Huginn on systems with low memory
- 0.5GB RAM 0.5GB swap will work relatively well with SSD drives, but can feel a bit slow due to swapping
- 1GB RAM 1GB swap will work with two unicorn workers and the threaded background worker
- 2GB RAM is the recommended memory size, it will support 2 unicorn workers and both the threaded and the old separate workers
- for each 300MB of additional RAM you can run one extra DelayedJob worker
Unicorn Workers
For most instances we recommend using: CPU cores = unicorn workers.
If you have a 512MB machine we recommend to configure only one Unicorn worker and use the threaded background worker to prevent excessive swapping.
小结:Linux系统Debian/Ubuntu,内存最好是在1GB以上,CPU核心=unicorn workers,这个在后面的设置要用到。
二、Huginn安装过程
The Huginn installation consists of setting up the following components:
- Packages / Dependencies
- Ruby
- System Users
- Database
- Huginn
- Nginx
1. 安装包/依赖
sudo is not installed on Debian by default. Make sure your system is up-to-date and install it.
# run as root!
apt-get update -y
apt-get upgrade -y
apt-get install sudo -y
Note: During this installation some files will need to be edited manually. If you are familiar with vim set it as default editor with the commands below. If you are not familiar with vim please skip this and keep using the default editor.
# Install vim and set as default editor
sudo apt-get install -y vim
sudo update-alternatives --set editor /usr/bin/vim.basic
Import node.js repository (can be skipped on Ubuntu and Debian Jessie):
curl -sL https://deb.nodesource.com/setup_0.12 | sudo bash -
Install the required packages (needed to compile Ruby and native extensions to Ruby gems):
sudo apt-get install -y runit build-essential git zlib1g-dev libyaml-dev libssl-dev libgdbm-dev libreadline-dev libncurses5-dev libffi-dev curl openssh-server checkinstall libxml2-dev libxslt-dev libcurl4-openssl-dev libicu-dev logrotate python-docutils pkg-config cmake nodejs graphviz
Debian Stretch
Since Debian Stretch, runit isn’t started anymore automatically, but this gets handled by the init system. Additionally, Ruby requires the OpenSSL 1.0 development packages instead of 1.1. For a default installation use these packages:
sudo apt-get install -y runit-systemd libssl1.0-dev
2. Ruby
The use of Ruby version managers such as RVM, rbenv or chruby with Huginn in production frequently leads to hard-to-diagnose problems. Version managers are not supported and we strongly advise everyone to follow the instructions below to use a system Ruby.
Remove the old Ruby versions if present:
sudo apt-get remove -y ruby1.8 ruby1.9
Download Ruby and compile it:
mkdir /tmp/ruby && cd /tmp/ruby
curl -L --progress http://cache.ruby-lang.org/pub/ruby/2.3/ruby-2.3.4.tar.bz2 | tar xj
cd ruby-2.3.4
./configure --disable-install-rdoc
make -j`nproc`
sudo make install
Install the bundler and foreman gems:
sudo gem install rake bundler foreman --no-ri --no-rdoc
3. 系统用户
Create a user for Huginn:
sudo adduser --disabled-login --gecos \'Huginn\' huginn
4. 数据库
Install the database packages
sudo apt-get install -y mysql-server mysql-client libmysqlclient-dev

# Pick a MySQL root password (can be anything), type it and press enter,
# retype the MySQL root password and press enter
For Debian Stretch, replace libmysqlclient-dev with default-libmysqlclient-dev. See the additional notes section for more information.
Check the installed MySQL version (remember if its >= 5.5.3 for the .env configuration done later):
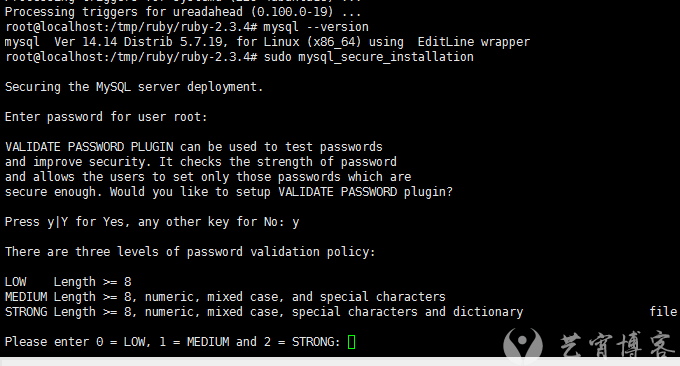
mysql --version
Secure your installation
sudo mysql_secure_installation
Login to MySQL
mysql -u root -p

# Type the MySQL root password
Create a user for Huginn do not type the mysql>, this is part of the prompt. Change $password in the command below to a real password you pick
mysql> CREATE USER \'huginn\'@\'localhost\' IDENTIFIED BY \'$password\';
Ensure you can use the InnoDB engine which is necessary to support long indexes
mysql> SET default_storage_engine=INNODB;

# If this fails, check your MySQL config files (e.g. `/etc/mysql/*.cnf`, `/etc/mysql/conf.d/*`)
# for the setting "innodb = off"
Grant the Huginn user necessary permissions on the database
mysql> GRANT SELECT, INSERT, UPDATE, DELETE, CREATE, DROP, INDEX, ALTER, LOCK TABLES ON `huginn_production`.* TO \'huginn\'@\'localhost\';
Quit the database session
mysql> \q
Try connecting to the new database with the new user
sudo -u huginn -H mysql -u huginn -p -D huginn_production

# Type the password you replaced $password with earlier
You should now see ERROR 1049 (42000): Unknown database \'huginn_production\' which is fine because we will create the database later.
You are done installing the database and can go back to the rest of the installation.
5. Huginn
Clone the Source
# We\'ll install Huginn into the home directory of the user "huginn"
cd /home/huginn

# Clone Huginn repository
sudo -u huginn -H git clone https://github.com/cantino/huginn.git -b master huginn

# Go to Huginn installation folder
cd /home/huginn/huginn

# Copy the example Huginn config
sudo -u huginn -H cp .env.example .env

# Create the log/, tmp/pids/ and tmp/sockets/ directories
sudo -u huginn mkdir -p log tmp/pids tmp/sockets

# Make sure Huginn can write to the log/ and tmp/ directories
sudo chown -R huginn log/ tmp/
sudo chmod -R u rwX,go-w log/ tmp/

# Make sure permissions are set correctly
sudo chmod -R u rwX,go-w log/
sudo chmod -R u rwX tmp/
sudo -u huginn -H chmod o-rwx .env

# Copy the example Unicorn config
sudo -u huginn -H cp config/unicorn.rb.example config/unicorn.rb
Configure it
# Update Huginn config file and follow the instructions
sudo -u huginn -H editor .env
If you are using a local MySQL server the database configuration should look like this (use the password of the huginn MySQL user you created earlier):
DATABASE_ADAPTER=mysql2
DATABASE_RECONNECT=true
DATABASE_NAME=huginn_production
DATABASE_POOL=20
DATABASE_USERNAME=huginn
DATABASE_PASSWORD=\'$password\'
#DATABASE_HOST=your-domain-here.com
#DATABASE_PORT=3306
#DATABASE_SOCKET=/tmp/mysql.sock

DATABASE_ENCODING=utf8
# MySQL only: If you are running a MySQL server >=5.5.3, you should
# set DATABASE_ENCODING to utf8mb4 instead of utf8 so that the
# database can hold 4-byte UTF-8 characters like emoji.
#DATABASE_ENCODING=utf8mb4
Important: Uncomment the RAILS_ENV setting to run Huginn in the production rails environment
RAILS_ENV=production
Change the Unicorn config if needed, the requirements.md has a section explaining the suggested amount of unicorn workers:
# Increase the amount of workers if you expect to have a high load instance.
# 2 are enough for most use cases, if the server has less then 2GB of RAM
# decrease the worker amount to 1
sudo -u huginn -H editor config/unicorn.rb
Important Note: Make sure to edit both .env and unicorn.rb to match your setup.
Note: If you want to use HTTPS, which is what we recommend, see Using HTTPS for the additional steps.
Note: For configuration changes after finishing the initial installation you have to re-export (see Install Init Script) the init script every time you change .env, unicorn.rb or your Procfile!
Install Gems
Note: As of bundler 1.5.2, you can invoke bundle install -jN (where N the number of your processor cores) and enjoy parallel gem installation with measurable difference in completion time (~60% faster). Check the number of your cores with nproc. For more information check this post. First make sure you have bundler >= 1.5.2 (run bundle -v) as it addresses some issues that were fixed in 1.5.2.
sudo -u huginn -H bundle install --deployment --without development test
Initialize Database
# Create the database
sudo -u huginn -H bundle exec rake db:create RAILS_ENV=production

# Migrate to the latest version
sudo -u huginn -H bundle exec rake db:migrate RAILS_ENV=production

# Create admin user and example agents using the default admin/password login
sudo -u huginn -H bundle exec rake db:seed RAILS_ENV=production SEED_USERNAME=admin SEED_PASSWORD=password
When done you see See the Huginn Wiki for more Agent examples! https://github.com/cantino/huginn/wiki
Note: This will create an initial user, you can change the username and password by supplying it in environmental variables SEED_USERNAME and SEED_PASSWORD as seen above. If you don’t change the password (and it is set to the default one) please wait with exposing Huginn to the public internet until the installation is done and you’ve logged into the server and changed your password.
Compile Assets
sudo -u huginn -H bundle exec rake assets:precompile RAILS_ENV=production
Install Init Script
Huginn uses foreman to generate the init scripts based on a Procfile
Edit the Procfile and choose one of the suggested versions for production
sudo -u huginn -H editor Procfile
Comment out (disable) these two lines
web: bundle exec rails server -p ${PORT-3000} -b ${IP-0.0.0.0}
jobs: bundle exec rails runner bin/threaded.rb
Enable (remove the comment) from these lines or those
# web: bundle exec unicorn -c config/unicorn.rb
# jobs: bundle exec rails runner bin/threaded.rb
Export the init scripts:
sudo bundle exec rake production:export
Note: You have to re-export the init script every time you change the configuration in .env or your Procfile!
Setup Logrotate
sudo cp deployment/logrotate/huginn /etc/logrotate.d/huginn
Ensure Your Huginn Instance Is Running
sudo bundle exec rake production:status
6. Nginx
Note: Nginx is the officially supported web server for Huginn. If you cannot or do not want to use Nginx as your web server, the wiki has a page on how to configure apache.
Installation
sudo apt-get install -y nginx
Site Configuration
Copy the example site config:
sudo cp deployment/nginx/huginn /etc/nginx/sites-available/huginn
sudo ln -s /etc/nginx/sites-available/huginn /etc/nginx/sites-enabled/huginn
Make sure to edit the config file to match your setup, if you are running multiple nginx sites remove the default_serverargument from the listen directives:
# Change YOUR_SERVER_FQDN to the fully-qualified
# domain name of your host serving Huginn.
sudo editor /etc/nginx/sites-available/huginn
Remove the default nginx site, if huginn is the only enabled nginx site:
sudo rm /etc/nginx/sites-enabled/default
Note: If you want to use HTTPS, which is what we recommend, replace the huginn Nginx config with huginn-ssl. See Using HTTPS for HTTPS configuration details.
Test Configuration
Validate your huginn or huginn-ssl Nginx config file with the following command:
sudo nginx -t
You should receive syntax is okay and test is successful messages. If you receive errors check your huginn or huginn-ssl Nginx config file for typos, etc. as indicated in the error message given.
Restart
sudo service nginx restart
Done!
Initial Login
Visit YOUR_SERVER in your web browser for your first Huginn login. The setup has created a default admin account for you. You can use it to log in:
admin (or your SEED_USERNAME)
password (or your SEED_PASSWORD)
Enjoy!
You can use cd /home/huginn/huginn && sudo bundle exec rake production:start and cd /home/huginn/huginn && sudo bundle exec rake production:stop to start and stop Huginn.
Be sure to read the section about how to update your Huginn installation as well! You can also use Capistrano to keep your installation up to date.
Note: We also recommend applying standard security practices to your server, including installing a firewall (ufw is good on Ubuntu and also available for Debian).
三、Huginn高级设置
Using HTTPS
To use Huginn with HTTPS:
- In
.env:- Set the
FORCE_SSLoption totrue.
- Set the
- Use the
huginn-sslNginx example config instead of thehuginnconfig:sudo cp deployment/nginx/huginn-ssl /etc/nginx/sites-available/huginn- Update
YOUR_SERVER_FQDN. - Update
ssl_certificateandssl_certificate_key. - Review the configuration file and consider applying other security and performance enhancing features.
Restart Nginx, export the init script and restart Huginn:
cd /home/huginn/huginn
sudo service nginx restart
sudo bundle exec rake production:export
Using a self-signed certificate is discouraged, but if you must use it follow the normal directions. Then generate the certificate:
sudo mkdir -p /etc/nginx/ssl/
cd /etc/nginx/ssl/
sudo openssl req -newkey rsa:2048 -x509 -nodes -days 3560 -out huginn.crt -keyout huginn.key
sudo chmod o-r huginn.key
四、Huginn问题解决
If something went wrong during the installation please make sure you followed the instructions and did not miss a step.
When your Huginn instance still is not working first run the self check:
cd /home/huginn/huginn
sudo bundle exec rake production:check
We are sorry when you are still having issues, now please check the various log files for error messages:
Nginx error log /var/log/nginx/huginn_error.log
This file should be empty, it is the first place to look because nginx is the first application handling the request your are sending to Huginn.
常见的问题:
connect() to unix:/home/huginn/huginn/tmp/sockets/unicorn.socket failed: The Unicorn application server is not running, ensure you uncommented one of the example configuration below thePRODUCTIONlabel in your Profile and the unicorn config file (/home/huginn/huginn/config/unicorn.rb) exists.138 open() "/home/huginn/huginn/public/..." failed (13: Permission denied): The/home/huginn/huginn/publicdirectory needs to be readable by the nginx user (which is per defaultwww-data)
Unicorn log /home/huginn/huginn/log/unicorn.log
Should only contain HTTP request log entries like: 10.0.2.2 - - [18/Aug/2015:21:15:12 0000] "GET / HTTP/1.0" 200 - 0.0110
If you see ruby exception backtraces or other error messages the problem could be one of the following:
- The configuration file
/home/huginn/huginn/config/unicorn.rbdoes not exist - Gem dependencies where not installed
Rails Application log /home/huginn/huginn/log/production.log
This file is pretty verbose, you want to look at it if you are getting the We\'re sorry, but something went wrong. error message when using Huginn. This is an example backtrace that can help you or other huginn developers locate the issue:
NoMethodError (undefined method `name\' for nil:NilClass):
app/controllers/jobs_controller.rb:6:in `index\'
config/initializers/silence_worker_status_logger.rb:5:in `call_with_silence_worker_status\'
Runit/Background Worker logs /home/huginn/huginn/log/*/current
Those files will contain error messages or backtraces if one of your agent is not performing as they should. The easiest way to debug an Agent is to watch all your log files for changes and trigger the agent to run via the Huginn web interface.
The log file location depends your Procfile configuration, this command will give you a list of the available logs:
ls -al /home/huginn/huginn/log/*/current
When you want to monitor the background processes you can easily watch all the files for changes:
tail -f /home/huginn/huginn/log/*/current我遇到的问题:unicorn workers设置导致Huginn502错误。上面已经说过CPU cores = unicorn workers,所以我们在执行:sudo -u huginn -H editor config/unicorn.rb时一定要根据自己的VPS的CPU来修改对应的数值。
五、Huginn面板使用
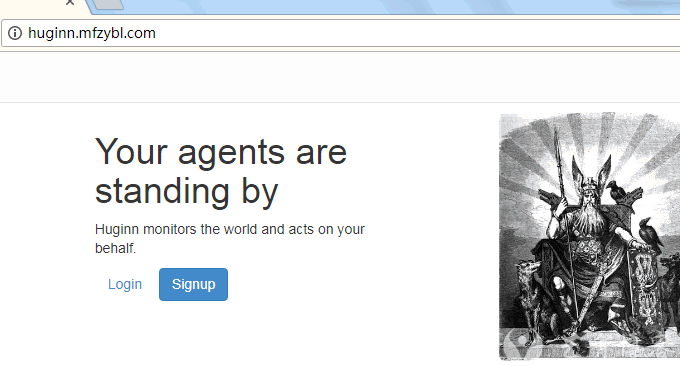
打开你的域名或者IP地址,你就可以访问到Huginn登录页面了,如果你按照上面的方法操作的话,登录账号是:admin,密码是:password,你可以进入到Huginn修改。
这就是Huginn的操作界面了,对应的就是Agents、Scenarios、Events、Credentials、Services。(点击放大)

Agents就是你的派出去搜索情报的“小兵”了。
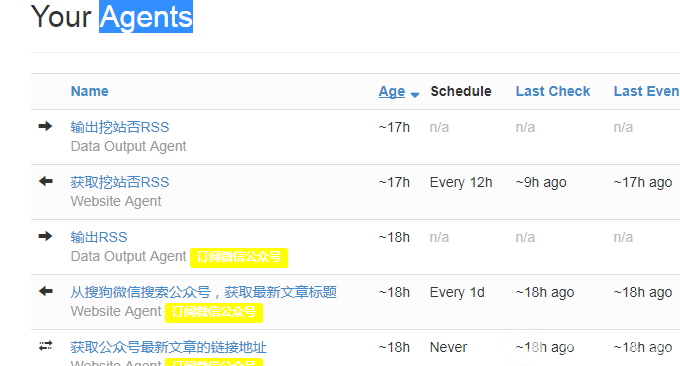
Events会记录“小兵”出去回来都带了什么东西。

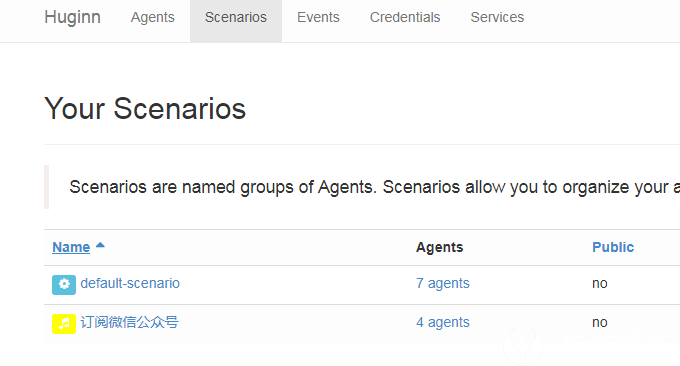
scenarios是“小兵”组团称呼,一个团可以放好多协作的“小兵”。
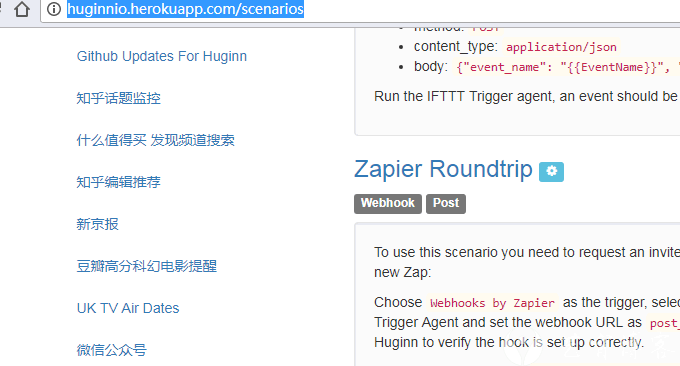
scenarios方便之处就在于你可以直接导入别人已经写好的脚本,自己只要修改对应的参数就可以直接上线运行了。这里有一个公共脚本库:http://huginnio.herokuapp.com/scenarios,常用的知乎话题监控、
知乎编辑推荐、豆瓣高分科幻电影提醒、微信公众号等都可以在这里下载到。
内容出处:,
声明:本网站所收集的部分公开资料来源于互联网,转载的目的在于传递更多信息及用于网络分享,并不代表本站赞同其观点和对其真实性负责,也不构成任何其他建议。如果您发现网站上有侵犯您的知识产权的作品,请与我们取得联系,我们会及时修改或删除。文章链接:http://www.yixao.com/tech/5526.html
 微信扫一扫
微信扫一扫
 支付宝扫一扫
相关推荐
-
Zabbix中文乱码问题的解决办法
Zabbix中文乱码问题解决 安装xp客户端后,在zabbix的Web页面的图表显示中,中文显示为乱码,出现乱码的原因是Centos Linux系统中安装的zabbix的字体不支持…
-
2021年欧洲市场最具潜力的9大电商平台
欧洲作为发达国家的聚集地,产生出众多优质的跨境电商平台。那欧洲2021年具有潜力的跨境电商平台有哪些? 1、法国最大本土电商Cdiscount 月访问量:1100万次 …
-
Microsoft Defender造成Windows系统运行卡顿的修复方法
Microsoft Defender 是 Windows 操作系统里面自带的安全软件,但是最近使用英特尔处理器的用户发现,该软件会造成系统运行效率的严重下降,甚至可能会造成日常操作…
-
VPS.net的VPS主机使用体验-账号验证与VPS主机性能速度测评
VPS.net的VPS主机当年也是和Linode一样的“贵”,一个1GB的VPS主机也得卖25美元,当年为了体验VPS.net的日本机房的VPS主机,自己也曾经购买了一个VPS,但…
-
使用Flutter开发简单的Web应用
本文指导读者如何使用 Flutter 运行和部署第一个 Web 应用。 Flutter 在 Android 和 iOS 开发方面走了很长一段路之后,已经迈入了一个新的阶段,即 We…
-
初探Windows 10 20H2新特性:打磨细节 优化体验
在 Windows 10 May 2020(20H1/Version 2004)功能更新中,微软对 Windows Subsystem for Linux(WSL)和其他核心组件进…
-
11种免费获取SSL证书的方式
从2018年7月1日开始,Chrome将显示所有未使用SSL证书的网站标记为“不安全”,而拥有SSL证书的网站的权重排名都会获得提升。 随着企业与网民网络安全意识的增加,全网正在走…
-
Linode被墙SSH无法连接通过Lish连接方法
Linode VPS主机是目前市面上较为稳定、性价比以及速度快的VPS商之一,尤其是在提升配置之后使用的用户非常多,口碑一向良好。但是我们使用过程中往往遇到端口被墙的情况,我们可以…
-
WordPress评论提交速度很慢的原因分析以及解决办法
wordpress自带评论提交正在提交, 请稍候. 等待好长时间的解决方法! 部分博客在提交评论的时候,等待时间很长,甚至有时候访问者不知道自己的评论是否提交成功,这个显然对于用户…